Member, Professional Photographers of America

wall gallery

DIY Wall Gallery: Part Two

In case you missed last week's blog post about my own diy wall gallery, you can read that here.

In this week's blog post, I am going to walk you through the process of making your own wall gallery of your family - step by step.

Step One.  So, you have a wall in your home that is the perfect space for showcasing your family's portraits.  It's a wall that is a focal point in your home.  It's a wall which friends and family love to look at when they visit.  Some people like their photographs to be very organized, while others just like to throw them on the wall.  Whichever your style is, there is a wall gallery design for you.  The great thing about wall galleries is that there is no wrong way to put one together.  It is YOUR wall gallery - your vision.  Where is your wall?  What colors surround this area?  

Step Two.  Now that you have the wall picked out, what type of layout do you want?  What layout appeals to you and showcases your portraits in a way that pleases you?  There are many ideas online that you can use to find ideas or you can come up with your own.  Consider the size of the wall.  Does it have more of a horizontal or vertical layout?  

Step Three.  You're making good process with your wall gallery by now and you have a pretty good idea as to what it will look like when it's all said and done.  But there's one more thing to consider with regards to the layout.  Do you want this space to include other pieces of artwork, such as metal art, other framed art, mirrors, quotes, etc?  If so, how do you want to incorporate those into your gallery?

Step Four.  Now it's time to decide which portraits you'd like to include in your wall gallery and are there any that you want to be the main focal point of the wall, such as a family portrait.  This main portrait should be larger than the others so that it is the main focus.  Consider a piece that is at least 16x20 in size.  Anything smaller, such as an 8x10, means that your other supporting portraits will more than likely be smaller and they will be too small on the wall. You want visitors to be able to SEE your family without having to pull out a magnifying glass or getting right up to the wall.  They should be able to see the portraits from a distance.

wall_display_guide_smith_family_photography

Step Five.  You have the layout, design, and portraits chosen.  Now to consider the frames you'd like to use.  Don't be afraid to think out of the box with this step!  There are so many unique ideas for frames.  You can use old wooden windows, make your own with barn wood, embellish the frame with various items, custom paint a frame, etc.  The sky is seriously the limit!

Step Six.  It's time to hang your portraits on the wall!  Many store bought frames use sawtooth hangers.  If you make your own frame(s), I suggest using a wire hanger.  It is much easier to hang and straighten on the wall.  

Step Seven.  Stand back and admire your beautiful family!

For more reading about diy wall galleries, check out this board on Pinterest.

If you make your own wall gallery, I'd LOVE to see a photo of it!

DIY Wall Gallery: Part One

We had our family portraits taken in September.  I had them printed with the idea of creating a beautiful wall gallery to show off my family.  I looked and looked at TONS of wall gallery ideas and just when I would choose one, I'd second guess myself.  I just couldn't find something that I absolutely loved, that is until I went to the Jewett Flea Market.  

wall_gallery_ideas

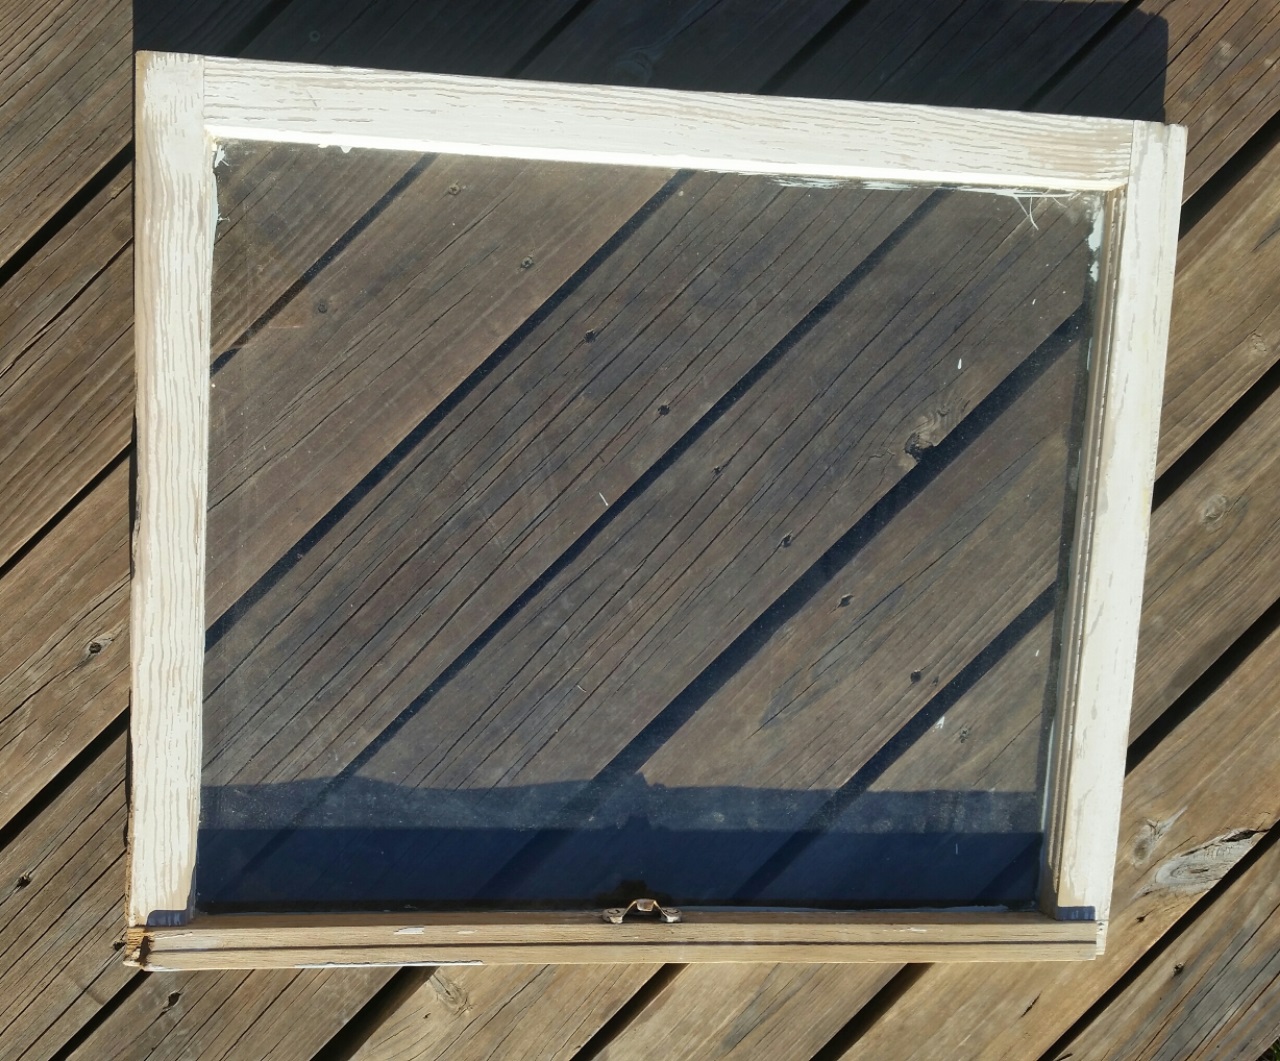
As my husband and I were walking through the flea market, we stumbled upon a vendor that had a large assortment of old windows.  I immediately had an idea!  An old window would make a beautiful and unique frame for our large family portrait that I had printed.  I looked at every window there and found one that I loved and my husband had to make sure it was the right size - since he's the one that's good at math!  

old_window_photo_frame_wall_gallery

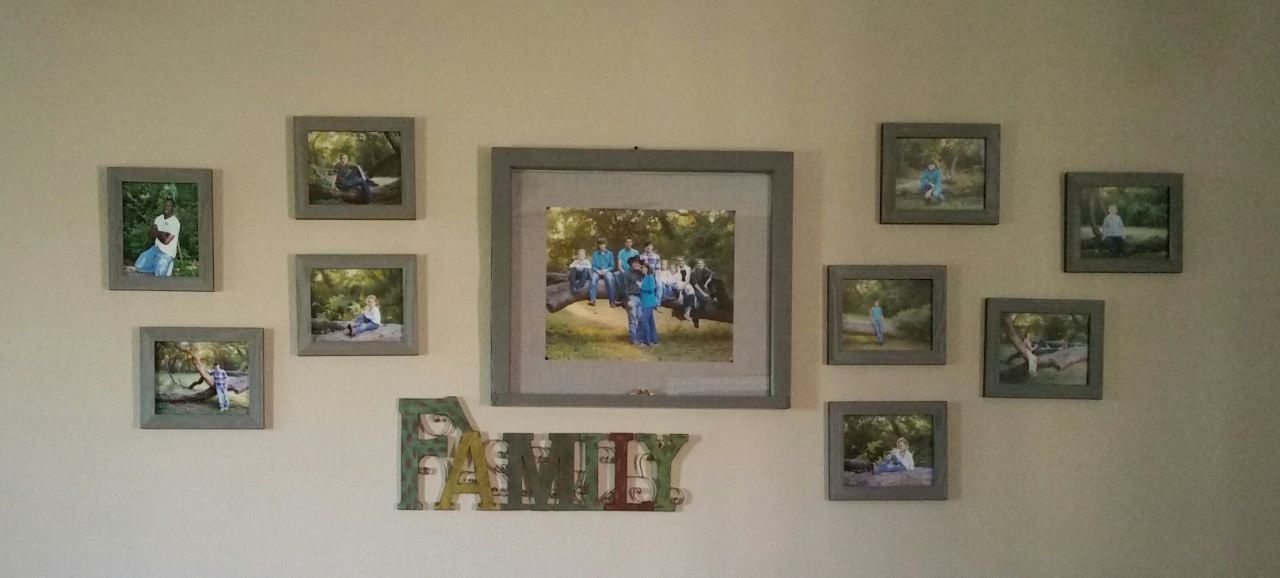
I began thinking of how this wall gallery would look.  I knew I wanted the large family portrait as the focal point of the wall, but we also have 9 kiddos between us.  I knew I wanted each child to have their individual portrait framed surrounding the large family portrait.  

 I now had a rough idea as to what I wanted the wall gallery to look like, but what color would I want this gallery to be?  After all, the wooden window frame had to be sanded and painted.  I considered the decor and colors of our living room and furniture.  I needed the gallery to coordinate with those colors.  I decided on a dark gray color.  I found gray barn wood frames at Michael's craft store on sale.  

8x10_frames_wall_gallery_michaels

Now that I had the individual 8x10 frames for the kids' portraits, I had to get the wooden window prepped and painted for the family portrait.  I began by sanding the wooden window to remove the flaking white paint.  After the window was sanded, I taped off the glass to keep most of the spray paint from getting on the it.  I had to paint the window with three coats for even coverage.  After the paint was dry, I removed the tape and had to scrape the glass with a razor blade to remove the over-spray from the spray paint, as well as the old white paint that was splattered on the glass originally.

I had the window, I had the 16x20 print, but I still needed a mat for this frame.  I know I did not want a plain white mat for this frame.  A white mat just seemed so "right" and I wanted something unique.  I decided to use fabric for the mat.  I bought one yard of fabric that was gray with a slight texture, nothing that would be too busy and take away from the portrait.  I used posterboard for the backing and wrapped the fabric around that so I could place the portrait in the window.  

The last step in putting the wall gallery together was to find a sign of some sort that would pull it all together.  I looked at three stores, but found what I was looking for at Hobby Lobby.  I am so in love with this wall gallery!  

family_metal_art_wall_gallery_hobby_lobby

Check back next week for the second part to this blog post, a step by step guide to making your own wall gallery on a budget.

smith_family_wall_gallery